How to Crochet a Stuffed Dinosaur: Free Pattern and Step-by-Step Guide
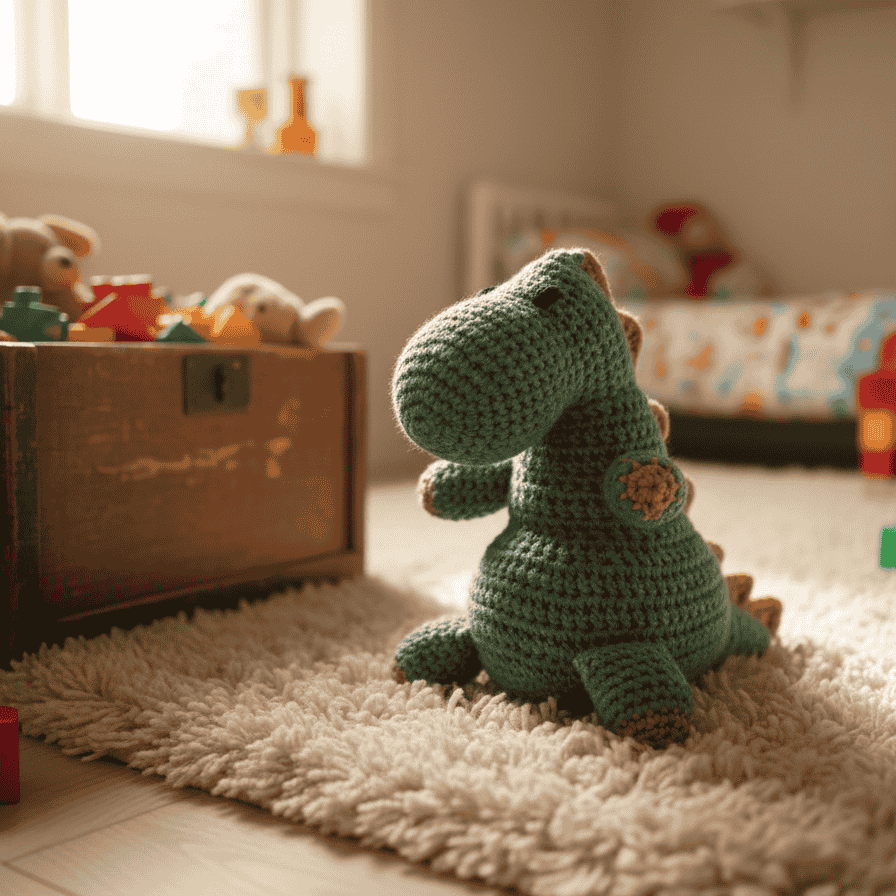
Looking for an adorable crochet project that kids will love? This beginner-friendly crochet dinosaur pattern creates a charming stuffed toy that’s perfect for children’s gifts, nursery décor, or expanding your amigurumi skills. Standing approximately 7 inches tall, this handmade dinosaur features cute spines along its back and makes a wonderful handmade gift.
What You’ll Need to Crochet This Dinosaur
Yarn Requirements
For this crochet dinosaur toy, you’ll need yarn from group B (DK/light worsted weight):
- 50g forest green yarn – for the main body
- 50g olive green yarn – for legs and decorative spines
- Small amount of black yarn – for embroidered eyes
Recommended yarn: Merino Extra Fine from Garnstudio or any similar DK weight yarn
Tools and Supplies
- Crochet hook: 3.5mm (US E/4)
- Stuffing: Polyester fiberfill or wadding
- Yarn needle: For sewing seams and embroidering eyes
- Scissors
Gauge for This Pattern
Achieving the correct gauge ensures your dinosaur turns out the right size:
- 20 single crochets x 20 rows = 10cm x 10cm (4″ x 4″)
If your stitches are too tight, use a larger hook. If too loose, use a smaller hook.
Finished Dinosaur Dimensions
- Height: Approximately 18 cm (7 inches)
- Length: Approximately 18 cm (7 inches)
This compact size makes it perfect for little hands to hold and cuddle.
Skill Level and Techniques
Skill Level: Beginner to Intermediate
This pattern uses basic crochet stitches including:
- Single crochet (sc)
- Double crochet (dc)
- Treble crochet (tr)
- Working in rounds
- Increasing and decreasing
- Working through multiple layers
How the Dinosaur is Constructed
This crochet dinosaur pattern features a unique construction method that creates a three-dimensional stuffed toy:
- Legs first: Crochet four separate legs (two front, two back) and set aside
- Nose to tail: Begin at the nose and work in rounds to create the head
- Flat face: Switch to working back and forth in rows for the facial features
- Attach legs: Incorporate the pre-made legs as you crochet the body
- Under-body: Create a flat bottom for stability
- Seam and stuff: Sew the bottom seam and fill with stuffing
- Finishing touches: Add the tail, close the back, and crochet decorative spines
Step-by-Step Crochet Dinosaur Instructions
Making the Front Legs (Make 2)
Round 1: Chain 2 with olive yarn. Work 5 single crochets in the first chain to create a small circle. Join with slip stitch.
Round 2: Chain 1, work 2 sc in each stitch around (10 stitches). Join and change to forest green.
Round 3: Chain 1, 2 sc in next stitch, 1 sc in next stitch; repeat around (15 stitches). Join.
Rounds 4-9: Chain 1, work 1 sc in each stitch around (15 stitches). Join.
Cut yarn and stuff lightly with fiberfill. Make a second leg.
Making the Back Legs (Make 2)
Work the same as front legs, but work one additional round in olive before changing to forest green. This creates slightly longer back legs for a realistic dinosaur shape.
Creating the Nose and Head
Round 1: Chain 2 with forest green. Work 5 sc in first chain. Join.
Round 2: Chain 1, work 2 sc in each stitch (10 stitches). Join.
Round 3: Chain 1, 2 sc in next st, 1 sc in next st; repeat (15 stitches). Join.
Round 4: Chain 1, 2 sc in next st, 1 sc in next 2 sts; repeat (20 stitches). Join.
Round 5: Chain 1, 2 sc in next st, 1 sc in next 3 sts; repeat (25 stitches). Join.
Round 6: Chain 1, 2 sc in next st, 1 sc in next 4 sts; repeat (30 stitches). Join.
Rounds 7-11: Chain 1, work 1 sc in each stitch (30 stitches). Join.
Round 12: Chain 1, 1 sc in next 2 sts, sc2tog; repeat, ending with 1 sc in last 2 sts (23 stitches). Join.
Round 13: Chain 1, work 1 sc in each stitch (23 stitches). Join.
Shaping the Face
Now switch to working in rows back and forth:
Rows 1-4: Chain 1, work 1 sc in each of 23 stitches. Turn.
Rows 5-6: Chain 1, work 2 sc in first stitch, 1 sc across, 2 sc in last stitch (27 stitches after row 6). Turn.
Rows 7-8: Chain 1, work 1 sc in each stitch. Turn.
Embroider the eyes using black yarn and loop stitch over rows 1-2, with 5 stitches between each eye.
Building the Neck
Work along the sides of the face (8 rows per side = 16 total rows):
Row 1: Work 2 sc in last face row, 1 sc in next 2 rows, 2 sc in next row; repeat (22 stitches). Turn.
Row 2: Chain 1, work 1 sc in each stitch. Turn.
Row 3: Chain 1, work 2 sc in first stitch, 1 sc across, 2 sc in last stitch (increase 2). Turn.
Continue alternating rows 2 and 3 until you have 6 total rows (26 stitches).
Attaching Legs and Creating the Body
Row 1: Chain 1, work 2 sc in first stitch, 1 sc in next 4 sts. Fold one front leg in half and place on body. Work 6 sc through all 3 layers (body + leg). Work 1 sc in next 4 sts. Attach second front leg the same way with 6 sc. Work 1 sc in next 4 sts, 2 sc in last stitch (28 stitches). Turn.
Continue increasing for the body following the pattern, creating the rounded belly shape. The body expands from 28 to 52 stitches over 13 rows.
Row 13: Attach the back legs using the same method as the front legs.
Creating the Under-Body and Tail
Work the under-body section, decreasing strategically to create a flat bottom:
Rows 1-3: Chain 1, work 1 sc in each stitch. Turn.
Row 4: Chain 1, work 1 sc in first 18 stitches, sc2tog; repeat 8 times, work 1 sc in last 18 stitches (44 stitches). Turn.
Row 5: Chain 1, work 1 sc in each stitch. Turn.
Row 6: Chain 1, work 1 sc in first 14 stitches, sc2tog; repeat 8 times, work 1 sc in last 14 stitches (36 stitches). Turn.
Row 7: Chain 1, work 1 sc in each stitch. Turn.
Row 8: Chain 1, work 1 sc in first 14 stitches, sc2tog; repeat 4 times, work 1 sc in last 14 stitches (32 stitches). Cut yarn.
Fold the bottom lengthwise and sew the seam stitch by stitch.
For the tail, work along the 16 rows at the back opening, decreasing from 16 stitches down to 4 stitches over 12 rows.
Closing the Back
Work single crochets around the entire back opening (approximately 90 stitches total). Stuff the dinosaur firmly with fiberfill. Fold the dinosaur in half and work through both layers to close the back seam.
Adding Decorative Spines
Using olive yarn, start at the tail tip and work this pattern along the back:
1 sc, skip 1 stitch, work (2 dc, 1 tr, ch 2, 1 tr, 2 dc) in next stitch, skip 1 stitch, 1 sc in next stitch
Repeat this pattern twice at the tail (skipping 1 stitch), then continue up the back skipping 2 stitches between spines. Finish with single crochets near the head.
Tips for Crochet Dinosaur Success
Achieving the Right Tension
Maintain consistent tension throughout to ensure your dinosaur has a professional finish. Tight chain stitches can cause bunching, so keep your foundation chains loose and even.
Stuffing Tips
- Stuff the legs lightly to maintain flexibility
- Fill the body firmly for a plush, huggable feel
- Add stuffing gradually as you close
To find more plushies patterns click here