How to Crochet Stuart Little: Complete Step-by-Step Pattern Guide
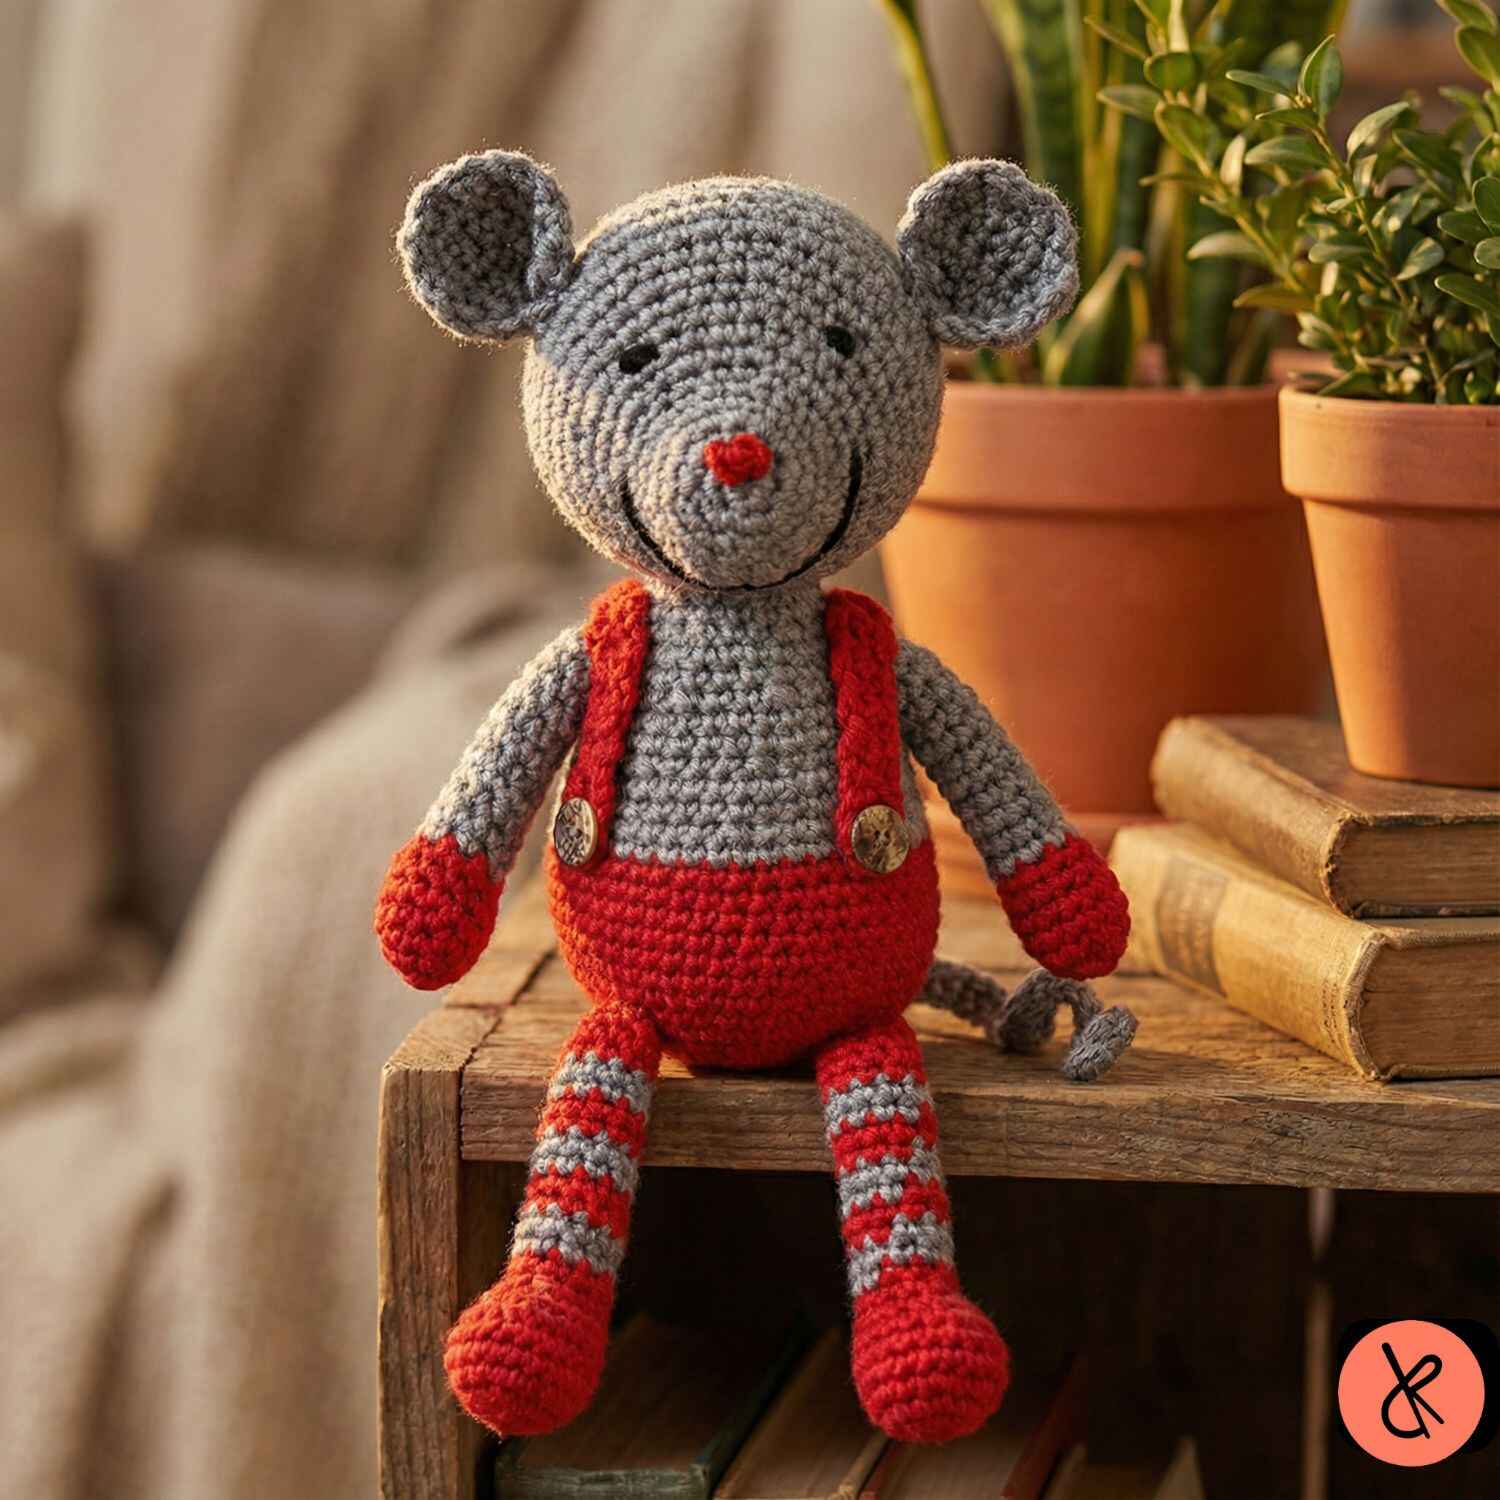
Crocheting adorable amigurumi characters brings joy to crafters of all skill levels, and this Stuart Little crochet mouse pattern is perfect for creating a charming 11-inch tall mouse with suspenders. Whether you’re making this as a Christmas gift or adding to your amigurumi collection, this comprehensive guide will walk you through every step of creating your own Stuart Little character.
What You’ll Need for Your Stuart Little Crochet Mouse
Before starting your crochet Stuart Little project, gather all necessary materials to ensure a smooth crafting experience. This pattern uses Big Merino yarn, which provides excellent stitch definition and a soft, professional finish.
Required Materials
The yarn requirements are straightforward and economical. You’ll need 50 grams of gray yarn (color 02) for the mouse body, 50 grams of red yarn (color 18) for the clothing details, and small amounts of black yarn (color 04) for facial features. A 4mm crochet hook works perfectly with this yarn weight, creating a fabric with approximately 18 single crochet stitches per 4 inches.
Don’t forget polyester stuffing for filling your creation. The amount needed will give your mouse a firm, huggable structure that maintains its shape over time.
Understanding the Crochet Stuart Little Pattern Structure
This pattern follows traditional amigurumi construction methods, working in continuous rounds from the center outward. The mouse stands approximately 28 centimeters tall when complete, making it an impressive display piece or cuddly toy.
Essential Crochet Techniques
Several fundamental techniques appear throughout this pattern. The magic circle start creates a tight, hole-free center for rounded pieces. Working in continuous rounds eliminates visible seams, while the crochet-together decrease method creates smooth shaping transitions.
Color changes happen at round ends for clean color transitions between the red pants and gray body. Placing stitch markers helps track round beginnings as you work continuously upward.

Creating the Stuart Little Mouse Head
The head construction begins at the snout tip and expands outward, creating the characteristic mouse face shape. Starting with a magic circle and four single crochet stitches, you’ll gradually increase to 48 stitches at the widest point.
Strategic shaping occurs in round eight, where decreases at the snout combine with increases around the back of the head. This creates the elongated mouse face profile. After reaching maximum width, gradual decreases taper the head toward the neck opening.
Before closing the head completely, embroider black eyes and a mouth using leftover yarn. Add a small red knot at the snout tip for the nose. Stuff the head firmly with polyester filling, then work the final decreasing rounds to close the opening securely.
Crafting the Mouse Ears
The ears work flat in rows rather than rounds, creating the distinctive curved ear shape. Each ear begins with five chain stitches and grows to eight stitches through strategic increases. Decreases in the final rows create the pointed ear tip.
Folding each ear double at the base before attaching creates dimensional, realistic-looking ears. Position them symmetrically on either side of the head for proper mouse proportions.
Building the Stuart Little Body with Red Pants
Body construction mirrors head techniques but incorporates the signature red pants detail. Beginning with a magic circle at the bottom, work increases up to 44 stitches, creating the rounded body shape.
The color transition from red to gray happens in round fourteen, representing where the pants meet the shirt. Using the color change technique described in the pattern ensures a neat transition line without loose threads or gaps.
After the color change, continue working decreases that taper the body toward the neck. The final round leaves an opening perfectly sized for attaching the head. Keep a long yarn tail for seaming the pieces together invisibly.
Making the Legs with Striped Socks
Leg construction starts at the foot edge, working increases to create the rounded foot shape. After establishing the foot circumference, strategic decreases shape the ankle and leg shaft.
The charming striped sock detail comes from alternating two-round stripes of gray and red yarn. Create three complete red stripes with gray stripes between them, finishing with additional red rounds. This creates legs measuring approximately 4 inches long.
Fill each leg firmly with stuffing before attachment, ensuring they can support the mouse in a standing position.
Constructing the Arms
Arms follow similar construction to legs but on a smaller scale. Starting with four single crochet stitches in a magic circle, work increases to twelve stitches for the hand width.
A single decrease round creates the wrist definition before transitioning to gray yarn for the arm portion. Continue working even rounds until arms measure approximately 3.5 inches long.
Adding the Characteristic Mouse Tail
The tail uses a unique chain-based technique that creates texture and dimension. Chain for approximately 8.75 inches, then work back along the chain with slip stitches in alternating chain spaces. This creates a twisted, rope-like appearance perfect for a mouse tail.
Assembly Tips for Professional Results
Proper assembly makes the difference between a good project and a great one. Position the head on the body with the facial features facing forward, aligned with the marker placed during head construction. Use small, invisible stitches to attach each piece securely.
Attach legs at the body bottom, spacing them evenly for stability. Position arms at shoulder height on either side of the body. The tail attaches at the center back, angled slightly downward.
Creating the Classic Suspenders
Suspenders add the signature Stuart Little touch to your creation. Chain three stitches and work single crochet rows for approximately 5.5 inches, creating narrow straps. Finish each suspender with a chain-8 button loop.
Attach suspender backs to the red pants section at the rear, spacing them about 1.5 inches apart. Cross the suspenders at the back for authentic styling. Position small buttons at the front of the pants, approximately 1.25 inches from center front, and loop the suspender ends around them.
Tips for Success with Your Crochet Mouse Pattern
Maintaining consistent tension throughout creates even stitches and proper sizing. If your gauge differs significantly from the pattern specifications, adjust hook size accordingly. Working too tightly makes stuffing difficult, while loose stitches allow filling to show through.
Count stitches regularly to catch errors early. Using stitch markers at increase and decrease points helps maintain accurate stitch counts. When changing colors, weave in ends as you go to minimize finishing work.
For facial features, use embroidery thread or thin yarn for detailed, neat results. Positioning eyes symmetrically creates an appealing expression. Experiment with eye placement before permanently attaching them.
Customizing Your Stuart Little Mouse
While this pattern creates a traditional Stuart Little appearance, personalization options abound. Consider different color combinations for the clothing, or add tiny accessories like a miniature book or walking stick. Embroidered details on the shirt or pants add unique character.
Adjusting yarn weight changes the finished size proportionally. Using sport weight yarn and a smaller hook creates a miniature version, while bulky yarn produces an oversized plush toy.
Care Instructions for Your Finished Mouse
Hand washing in cool water with mild detergent keeps your creation looking fresh. Gently squeeze out excess water without wringing, then reshape and air dry flat. Avoid machine washing, which can felt the yarn and distort the shape.
Store your crochet mouse in a cool, dry place away from direct sunlight to prevent color fading. If the mouse becomes dusty, use a soft brush or cool blow dryer on low setting to refresh it.
Troubleshooting Common Crochet Challenges
If increases create visible holes, work increases into the back loop only for tighter stitches. When pieces appear too small or large, check your gauge and adjust hook size before continuing.
Lumpy stuffing shows through stitches when filling is distributed unevenly. Add stuffing in small amounts, distributing it evenly throughout each section. For firmer pieces, add extra stuffing; for softer toys, use less.
Uneven seams often result from misaligned pieces or inconsistent stitch tension. Pin pieces in position before sewing, and use matching yarn for invisible seams.
Why This Pattern Works for All Skill Levels
Though it appears complex, this Stuart Little pattern breaks down into manageable sections suitable for confident beginners. Each body part uses fundamental amigurumi techniques repeated throughout the pattern. Working one section at a time prevents overwhelm and allows you to master each technique before progressing.
Clear round-by-round instructions eliminate guesswork, while the repetitive nature of increases and decreases builds confidence. The finished mouse provides satisfying results that look impressive regardless of experience level.
Frequently Asked Questions
How long does it take to crochet Stuart Little?
Most crocheters complete this project in 8 to 12 hours, depending on experience level and crafting speed. Breaking the work into sessions over several days makes it more manageable while allowing time to perfect each component.
Can I use different yarn for this pattern?
While the pattern specifies Big Merino yarn, any worsted weight yarn producing similar gauge works well. Test your gauge with your chosen yarn to ensure proper sizing. Acrylic yarn offers durability and easy care, while cotton provides structure and definition.
What skill level is required for this crochet mouse pattern?
This pattern suits advanced beginners who understand basic stitches and can work in rounds. Familiarity with increases, decreases, and color changes helps, though the pattern provides detailed instructions for each technique.
How do I make the facial features look professional?
Use embroidery floss or thin yarn in black for clean, defined features. Sketch eye and mouth placement with pins before embroidering to ensure symmetry. Small, tight stitches create neater details than large, loose ones.
Can I make Stuart Little in different sizes?
Absolutely! Changing yarn weight and hook size proportionally adjusts the finished size. For a smaller mouse, use sport weight yarn with a 3mm hook. For a larger version, try bulky yarn with a 6mm hook, adding extra stuffing as needed.
Why does my mouse lean to one side?
Uneven stuffing or misaligned limb placement causes leaning. Ensure even stuffing distribution throughout the body, and attach legs at equal distances from the center bottom. Firmly packed feet help the mouse stand independently.
What’s the best way to attach the head to the body?
Use the yarn tail from the body and a yarn needle to whipstitch around the opening, catching stitches from both the head and body. Work around the entire circumference twice for security, then weave the end invisibly through several stitches before trimming.
Can children play with this crochet mouse safely?
When constructed with secure stitching and firmly attached features, this mouse makes a safe toy for children over three years old. Avoid button embellishments for very young children, substituting embroidered details instead. Regular inspection ensures all components remain securely attached.
How do I prevent the red color from bleeding onto the gray?
Pre-washing yarn before starting prevents color bleeding issues. Alternatively, use high-quality, colorfast yarn designed for toys. When washing the finished mouse, use cold water and color-safe detergent.
What if I run out of yarn mid-project?
The specified 50-gram amounts include slight excess, but individual tension variations affect yarn usage. Purchase an extra ball of each color if concerned, or substitute a similar shade if matching dye lots proves difficult. Slight color variations often go unnoticed in the finished piece.
Related Projects and Resources
For more amigurumi patterns and crochet inspiration, explore our extensive collection at knithing.com. Discover additional plushies patterns ranging from beginner to advanced levels, including seasonal decorations and character designs.
Learn essential crochet techniques through detailed photo tutorials and video guides. Our yarn selection guide helps you choose the perfect materials for any project, while our crochet tips section offers solutions to common challenges.
Join our crafting community by sharing your finished Stuart Little mouse on social media, and browse our gallery for inspiration from fellow crocheters. Subscribe to our newsletter for exclusive patterns, technique tutorials, and special offers on premium yarns and tools.
Conclusion
Creating a crochet Stuart Little mouse combines fundamental amigurumi techniques with charming character design. This pattern rewards crafters with an adorable finished piece perfect for gifting or displaying. The detailed instructions guide you through each step, from constructing the basic shapes to adding those signature suspenders.
Whether you’re expanding your amigurumi repertoire or seeking a memorable handmade gift, this Stuart Little pattern delivers satisfying results. Gather your materials, set aside some crafting time, and enjoy bringing this classic character to life through crochet. Your finished mouse will showcase your skills while bringing smiles to everyone who sees it.
Ready to start your next crochet adventure? Browse more amigurumi patterns at knithing.com and discover endless creative possibilities.